The pinnacle of a simple but reliable summer side, corn on the cob is a BBQ must. While I love to break out the grill for sweet corn, boiling corn on the cob is quick and easy and perfect all seasons. All it requires is a large pot, lots of salt, and a close eye.
Corn on the cob is, of course, delicious with melted butter, salt, and pepper, but your options don’t stop there. If you want to get creative, check out our favorite corn on the cob toppings for plenty of inspo.

What People Are Saying:
„5 stars for the recipe and all the extra info you provided.” –GoldGuitar
„Awesome taste and texture. This is the way to do it so every bite is crisp and juicy.” –FoodManYIELDS:4 serving(s)PREP TIME:5 minsTOTAL TIME:10 minsCAL/SERV:225
Ingredients
- Kosher salt
- 4 ears of corn, shucked
- 4 Tbsp. unsalted butter, melted
- Freshly ground black pepper
See All Nutritional Information![]()
Directions
![]() SAVE TO MY RECIPES
SAVE TO MY RECIPES
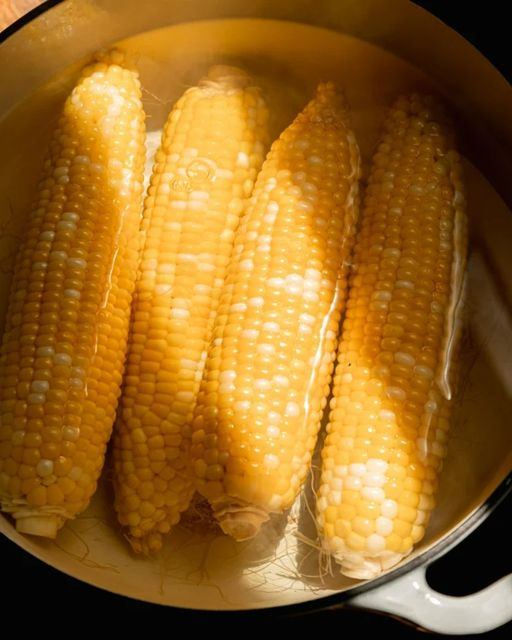
- Step 1Bring a large pot of salted water to a boil. Add corn and cook until kernels are slightly plump and bright yellow, about 5 minutes.
- Step 2Drain corn. Transfer to a platter. Brush with melted butter; season with salt and pepper.
 PARKER FEIERBACH
How To Boil Corn On The Cob
Ingredients
• Corn: When it comes to corn, the fresher, the better. I look for ears that feel heavy for their size, with moist, slightly tacky tassels and tight, vibrant green husks. The kernels should feel plump and tightly packed.
Step-By-Step Instructions
Fill your largest pot with water and bring to a boil. Now throw in a literal fistful of salt. Seriously. Yes, it will look like a lot; no, the corn won’t come out oversalted (most all of the salt will wind up down the drain). It might sound crazy, but to properly season the ears, the water should be salty enough to taste like seawater.
 PHOTO: BRANDON BALES
While the water is heating up, shuck the corn. Starting from the tassel end, work your way around each ear, peeling the husk and silks (the thread-like fibers) down toward the stem. When you’ve fully unzipped the husk from the ear, snap it off and discard. Go back over the ear to remove any remaining silks.
 PHOTO: BRANDON BALES
Working in batches of 4 or 5 ears if needed (to avoid crowding), add the corn to the pot. As soon as the water returns to a boil, set a timer for 5 minutes (a good ballpark figure) and grab a pair of tongs so you’re ready for action; overcooking is the enemy here. When the corn has turned a bright marigold yellow and the kernels look a smidge more plump than before, dive in and remove the ears to a baking sheet or platter. But don’t lose focus now, because you’re going to want to brush those ears with butter and season them with salt and pepper while they’re still hot. Okay, exhale. Go enjoy your handiwork.
 PHOTO: BRANDON BALES
Recipe Tips
• How to shuck corn: Starting at the tassel end, grab the husk and as much of the silk as possible and pull downwards, toward the stem of the corn. Repeat until all of the husk is off. Rub off as much of the lingering silk as possible. Shucking can get messy thanks to all the silk, so we recommend working over a trash can.
• When to season the corn: Let the cooking water do the seasoning for you.Use the largest pot you have, fill it with water, and salt it really well. Don’t be shy—your water should practically taste like the ocean. Your corn won’t taste salty in the end, the salt will just bring out its flavor.
• How to tell when your corn is done boiling: This one’s a little tricky, as there aren’t any surefire indicators. Your best bet is to pay close attention to color and kernel size. The moment the kernels have turned bright yellow and look a little plumper than before, the corn is likely done. Remember, the goal is juicy, crunchy kernels—not mushy, tough ones. Fresh corn typically cooks faster than older corn, so keep that in mind and adjust cooking times accordingly.
What To Serve With Boiled Corn On The Cob
This boiled corn can be served with pretty much anything, but if you want to go the summer potluck route, potato salad and burgers fit the bill. 😋
Storage
Got leftovers? Lucky you. Save that corn for salad, fried rice, and/or chowder. You’ll get the best flavor by shaving the kernels from the cob before storing. Just stand each ear, stem side down, on a baking sheet and slice away the kernels with a sharp knife, using a downward stroke and angling the knife slightly toward the cob. Transfer the kernels to an airtight container and refrigerate for up to 3 days, or place in a resealable plastic bag, press out as much air as you can, and freeze for up to 8 months.